As the founder of cyclone press, Sarah has 15+ years of experience providing branding, design, business and technical expertise to startups and small businesses. After personally building ~100 websites, she's become an evangelist for utilizing technology/automation to build systems and processes to run businesses more effectively. She’s also a mixed media artist and writer who reads; obsessed with books, the intersection of ideas, and how they apply to your latest startup idea.
As of February 1, 2024, email sending best practices are now requirements.
Remember a few years ago how SSL (https://) used to be recommended for your website, then Google decided it was a requirement? Yeah, it’s like that, but for email.
If you send email to Gmail/Google Workspace users (let’s be honest – that’s everyone), then you need to meet the following requirements:
Only send email newsletters from your branded domain (don’t send newsletters from [email protected]: send from [email protected]). You should definitely be doing this anyway.
Prevent email impersonation by setting up SPF or DKIM email authentication for your domain. These are DNS records added to yourbusiness.com, which we’ve already taken care of if you’re a client on a Managed Hosting Plan. Read the guidelines at the links below to learn more about these records.
Maintain a low spam report rate of under 0.1% (that’s fewer than 1 spam report per 1,000 emails), and never exceed more than 0.3% (3 spam reports per 1,000 emails). So also what you were (hopefully) already doing.
Here are a few handy links to announcements from several of the big companies (plus MailPoet, which is the email marketing software we offer to our clients for free).
If you’re starting a business (or even just doing a few projects on the side), you must use a billing/invoicing/accounting system to track income and expenses. A spreadsheet isn’t terrible, but come tax time you’ll need reports. Creatives: do NOT try to use design software to make fancy invoices. There’s no way to track these, and you’ll end up with a nightmare.
In the early days of cyclone press I used an invoicing software (without real accounting features).
Then I used Xero for a bit, which is an up-and-coming cloud option.
After switching to a new accountant (with special software pricing) I broke down and switched to Quickbooks Online, something I swore I’d never do. While there were a few nice things, it was overall as terrible as expected, particularly in the recurring invoice department (practically nonexistent).
2 years ago I switched to Wave and have no regrets whatsoever.
Wave is now the billing software I recommend to all my clients, and the best part is that it’s totally free. I want to quickly outline why I like it, then give you a walkthrough of how to set up a new Wave account.
Wave Accounting Pros
Wave is clean, simple, and incredibly user-friendly. It does what it needs to do, beautifully.
Recurring invoices are a dream. Easy to set up, and more importantly, easy for clients to pay. They can choose to save credit card info for automatic payment.
Online payment setup is practically instant.
Reconciliation is unbelievably easy.
It’s easy to add and switch between multiple businesses.
Zapier integration.
If you need payroll, you can add it (although that service isn’t free).
It’s easy to add users (bookkeepers, tax preparers etc.)
Wave Accounting Cons
My biggest complaint is that there’s no way to add credits to a client accounts. I use renamed invoices with positive amounts instead, but it’s an annoying workaround.
Products are not searchable.
I’d like to see more Zapier options.
No time tracking. I don’t actually see this as a con: I’ve never used this as part of an invoicing system and I think it should be separate anyway, but just FYI. I use Timecamp for the bulk of my time tracking.
Ads. HR Block bought Wave in 2019 so they’re obviously going to give themselves ad space, and because the product is free they’re trying to make money somewhere. You might click on a tab to discover it’s a partnership with another B2B product. As long as they maintain Wave this doesn’t bother me.
No downloadable app (I despise in-browser apps). There are ways to run cloud apps as a standalone app on your desktop (on Mac) which is what I do.
No way to digitally accept estimates.
Because it’s free, updates are infrequent.
I feel like I should clarify the fact that all of my cons are just nice-to-have features, not actual needs. The top two are really the only things I’d like to see updates for, but I can’t be truly picky because again, Wave is totally free.
getting started with Wave Apps accounting software
Here's a quick how-to process to get your small business up and running with Wave. At the end of this tutorial, you'll be able to send invoices and receive online payment.
I'm no accountant, so none of this is legal/tax advice, but I do work with soloproneurs and startups to establish processes and set up software. If you need help getting set up with a business email address, branding or a website, get in touch.
Click the link above to open the Wave registration page in a new tab and follow along. You’ll want to sign up with your work email and a strong password (or log in with Google).
Step 2 : Create a business account
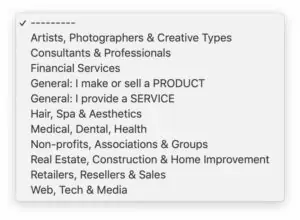
Follow the prompts to add the information for your business. Available business types are listed below.
Step 3 : Invite your accountant or bookkeeper
Chances are you’ll need to add another user to your account. You’ll find the option to invite users under ‘Settings’ in the sidebar, then ‘Users.’ There are currently 5 types of access level. Choose the appropriate level, then add your new user’s information. They’ll receive an invitation to join your account via email.
Step 4 : Customize the branding for your business
Under Settings, go to ‘Invoice Customization’. There are 3 invoice templates, an option to upload your logo and choose an accent color. While this doesn’t sound like much, the “Contemporary” template is well-designed so you don’t need to do much. Use a medium resolution PNG (with a transparent background) for your logo.
Now scroll down to customize your invoice terms, payment settings, and adjust units to your business. Make sure to ‘Save all changes.’
Step 5 : Adjust online payment options
Wave has their own payment processing system that makes it incredibly easy to accept online payments. Toggle these on and off as needed.
Step 6: Add sales tax (if you sell products)
Under Settings > Accounting, click ‘Sales Taxes’ add your sales tax rate, if needed.
Step 7: Add business bank account to receive payouts
Under Settings > Banking, click ‘Payouts’ and follow the prompts to add the bank account that online payments will deposit into.
Step 8: Add your business bank account for tracking expenses
Once your account is set up, look for the ‘Banking’ tab on the sidebar, then click ‘Connected Accounts’ to add your business bank account. Start typing to search for your bank, then select it and log in with your online banking credentials.
Important note: always separate your personal and business expenses. Go set up a business bank account and use it for all business purchases and payments. Do not use your personal bank account for anything business related. This is rule number 1.
Step 9: Add standard products and/or services (optional)
If you charge an hourly rate or have a flagship product, you’ll want to add those under Sales > Products & Services. Make sure you’re choosing the correct income account when you set these up. When you select ‘Sell this,” it will give you the default option to add it to the ‘Sales’ income account.
To better track different income streams you’ll probably want to add additional accounts, which you can do under Accounting > Chart of Accounts. For example: the bulk of what we do at cyclone press is web design, development & hosting, but we also sell business cards and other printed products, which I track under a separate income account.
Step 10: Send your first invoice (or estimate)
At this point you’re ready to go. You can create an estimate, then convert it to an invoice when accepted. Or send out that invoice for the project that was the impetus to get an accounting system set up in the first place.
If you created a product, you can click to add it to the estimate or invoice, meaning the 5 minutes of up-front work to set it up is going to save you a ton of time in the long run.
Choose to include a message when you email it, and pick how often you want the client to receive reminders to pay.
There’s a lot more I could cover on the day-to-day use of Wave, but because it’s so user-friendly, it’s going to be fairly straightforward to figure out.
Do you have specific questions?
Drop them in the comments and I might do a follow-up post. There’s also a chat bot inside Wave you can use to find links to help articles in the Wave Help Center.
Did your email open rates increase recently? That’s not as good as you think it is…
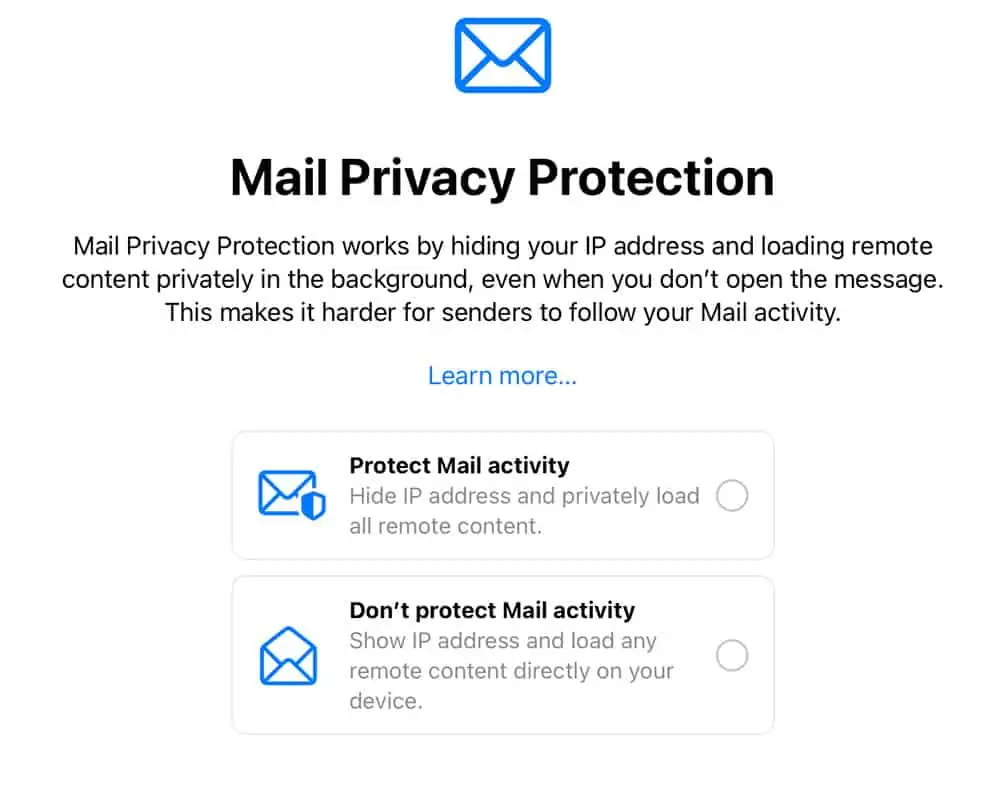
Apple’s newest iPhone operating system is out now (iOS 15), and it comes with big privacy changes. One of the new features is “Mail Privacy Protection.” The first time you open your email after the update, you’ll see this notification:
I mean, who doesn’t want to protect their information?
Let’s assume everyone will choose ‘Protect Mail activity.’
Like most soloproneurs and small businesses, you probably send email newsletters. And after sending, you probably view the reports to see how many people have opened or clicked on links, right? This works by loading hidden data when the email is opened. Now, on iOS 15, Apple is going to preload that data when the email is received. This means that your open rates are probably going to increase, but it won’t necessarily be because more people are opening your emails.
This impact will come only from email opened on Apple Mail and iPhones/iPads (which might be up to half the market). It’s not the only privacy update coming either: iOS 15 also enables hidden IP addresses and a ‘Hide My Email’ feature. We’ll only see more of this as our tech services (hopefully) become more privacy focused. This is great for all of us as consumers, but from a marketing standpoint, it will be important to move away from open-rate data to other metrics, like clickthrough rates.
Do you need help with your existing email marketing? Maybe you’re a soloproneur just getting started, and you have yet to start building an email list at all. We’d love to break down this process for you – schedule a discovery call to learn more.
WordPress is a Content Management System (CMS); software that enables entrepreneurs to design and manage a website without learning how to code.
It’s open source, meaning it’s free and available for anyone to use. It also powers ~42% of the Internet; everything from personal blog and podcast websites, to photographer and artist photo galleries, to small business service, product and startup landing pages. You can build almost anything with WordPress, with an important caveat…
there are actually 2 types of WordPress…
WordPress is really just a piece of software, but there are 2 ways to use it, with big implications. The naming structure is… a bit confusing.
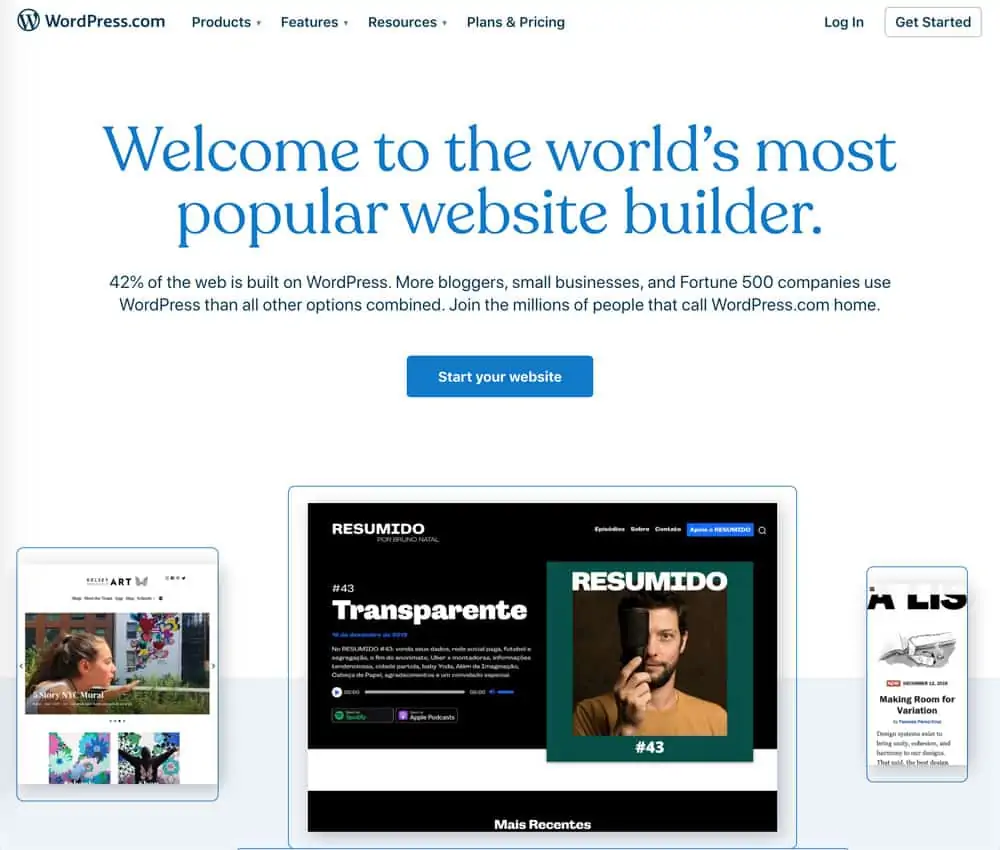
WordPress.com
WordPress.com
WordPress.com is a SaaS (Software As A Service) – a cloud hosting system that is similar to Squarespace. You sign up for a cloud account that includes the domain name and web hosting all in one. However, like Squarespace, options are limited and everything requires a cost/plan upgrade. Maybe you start with a more basic plan and decide you want scheduling. That’s going to be +$X per month. You’re locked into their system and pricing tiers, just like any other website builder platform.
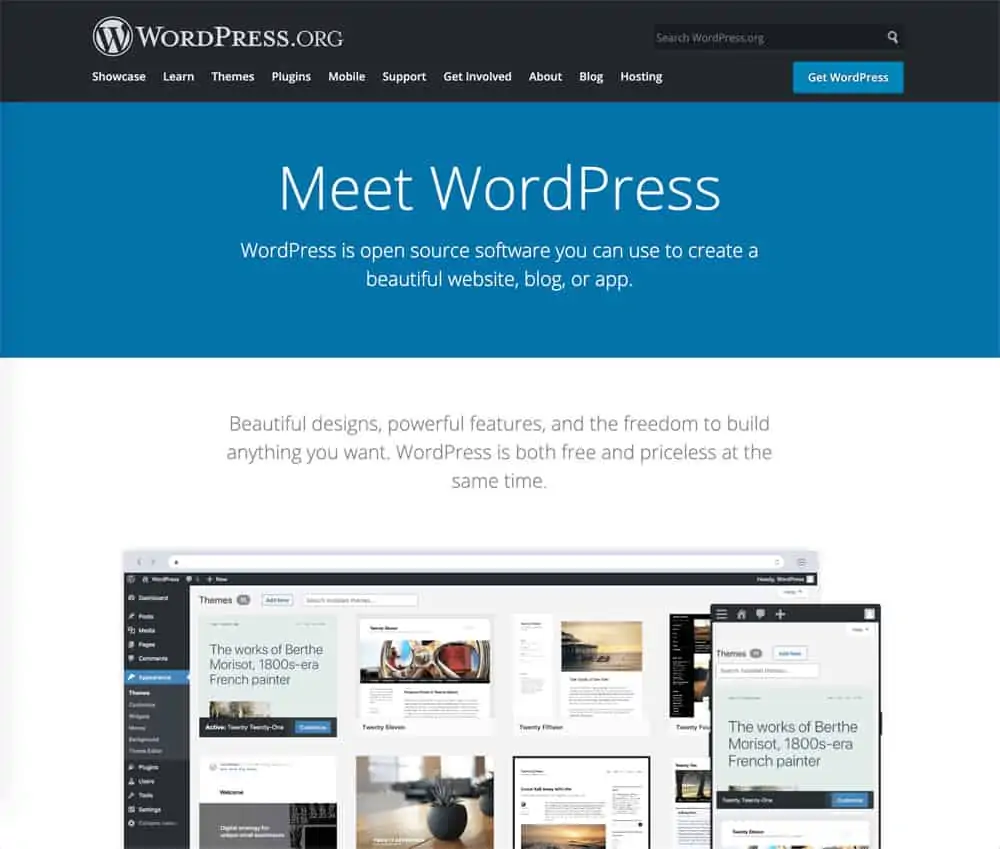
WordPress.org
WordPress.org
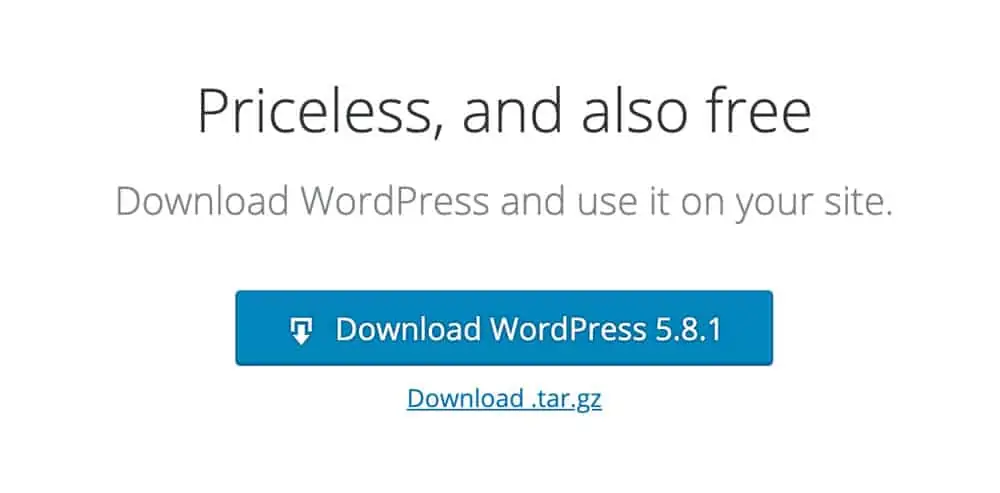
WordPress.orgis the hub for all the help articles, forums, and the plugin directory. This is where you go to download the WordPress software to install on your own web server. You’ll need to purchase separately the domain name (yourbusiness.com) and a website hosting plan (where you’ll upload the WordPress software). You can then set everything up yourself, exactly the way you want it. This is known as self-hosted WordPress, and this option is limitless.
All that stands between you and a powerful package of website software is this big blue button.
With self-hosted WordPress, you own and control everything.
When you run WordPress on your own hosting, you can install any theme, any plugin, send email newsletters, offer free downloads, add an online store, add custom functionality–anything you can dream up, with no additional hosting fees or pricing package upgrades from the platform itself. Many of these themes and plugins are free.
wait, what’s a WordPress theme?
WordPress is the platform.
The theme is the overall framework that styles it.
If WordPress is the coat hanger, the theme is the button-down shirt that provides the overall shape.
If you plan to launch an e-commerce store, you might choose a product-focused theme. If you’re creating a personal art portfolio, you might want a theme with built-in portfolio gallery features. There are many highly stylized themes that offer special functionality. A real estate theme might have a built in listings post type, for example.
At cyclone press, we use a couple of lightweight, all-purpose themes that will work for any business, then style them and add the exact features and look you need. After years of designing websites, I believe this is almost always the better option. Individual theme developers all tend to style their theme options differently, and may not include much customizability. When they offer more customizability, it makes the theme “heavier,” meaning it won’t load as quickly. There’s also the potential for hacks if you select a theme that was badly built or isn’t updated regularly.
I’ve used my experience to put together what I believe is the best possible combination for small business websites: a great theme base + a highly customizable page builder. This combo will work for anything you can throw at it, whether you’re a startup, a growing business, or an artist. You’re looking at that package right now.
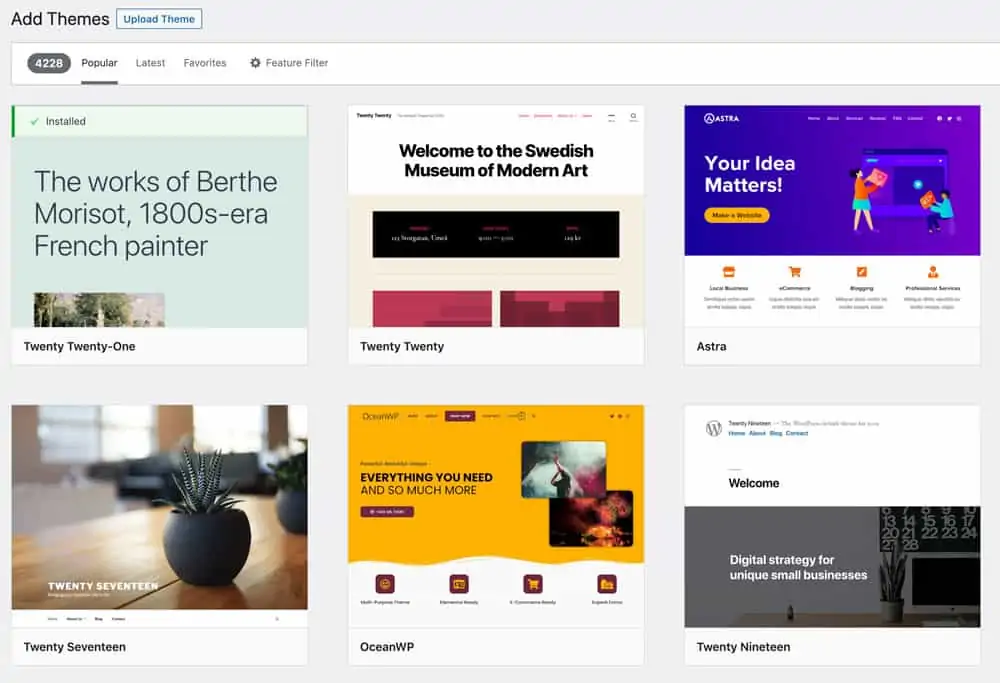
A few free WordPress theme options.
How to install a WordPress theme:
Inside your WordPress dashboard, go to Appearance > Themes > Add New
Search for the theme you’d like to use (or click ‘Upload New’, if you’ve downloaded a zipped file to install)
Click ‘Install’ (or upload)
Click ‘Activate’
Click ‘Customize’ and upload your logo, adjust the colors, fonts, etc.
Congratulations! Your site now has an entirely different look and feel! Not a fan? Repeat the process to try another. You can access theme options from the Appearance > Themes tab, and the bulk of the customizations are done via Appearance > Customize.
what’s a WordPress plugin?
Let’s go back to our coat hanger/shirt example. Would you like that button-down shirt to have pockets? With snaps? Or perhaps some Star Wars themed cufflinks? Those extra special features are plugins.
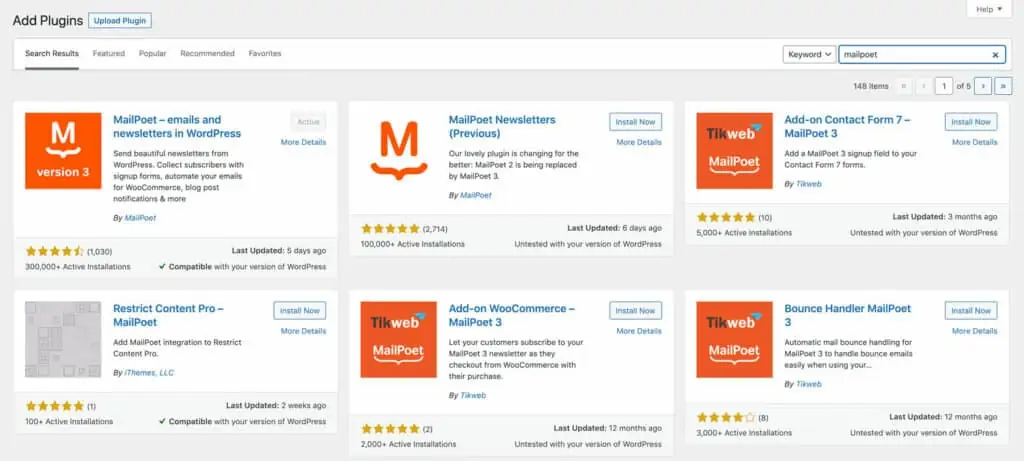
Plugins are nicely packaged snippets of code that add extra functionality to your website. Let’s say you’ve realized how important it is to build a mailing list, so you want to add a signup form to your footer. You decide you’re going to use MailPoet, which runs inside your WordPress site. This is the plugin we recommend and use for email newsletters, and it’s free for up to 1000 subscribers (and we offer MailPoet Premium for free through with our WordPress website hosting). Here’s how you’d set it up:
Some of the available options seen when searching ‘Mailpoet.’
How to install a WordPress plugin:
Inside your WordPress dashboard, go to Plugins > Add New
Search for MailPoet
When the search results populate, find the correct plugin and click ‘Install’
Click ‘Activate’
Tweak the Mailpoet Settings to your satisfaction
Congratulations! Your website now has email newsletter capabilities! Plugins usually add a tab to your sidebar, so you now have a MailPoet tab with newsletters, lists, forms and settings ready to customize. It really is that simple.
Another WordPress Plugin Example: Let’s say you want to share recipes on your website. You could search for and choose a recipe plugin, then follow the same process above, and you’ll now have a tab in your sidebar for recipes. Depending on the specific plugin options, it might add special fields for ingredients, instructions with prep time and more.
There are many fantastic plugins we recommend that are paid, but even paid options often have a freemium (reduced features) version you can try first to see if it’s worth the (small) investment. For our recipe plugin example, the base plugin might be free, but the premium version might include the ability to scale servings or download printable versions. This allows you to test and confirm it works for you before investing any money. And by small fee, I mean something like $50/year, $99/year, etc. Check out our 5 must-have plugins for every WordPress website.
A page builder is front end editing software that runs on top of WordPress. It means you can design your site live, in real time using a WYSIWYG editor, instead of having to jump between the front end and back end. WYSIWYG = What You See Is What You Get. Click to drag and drop different modules for text, images, buttons, etc., then adjust the settings in the accompanying control panel. It makes design much more straightforward.
Elementor is a page builder which is incredibly popular for some reason (I do not recommend it). There are quite a few options out there and have various pros and cons, the biggest issue often being how much they can slow down your site. WordPress sites don’t need a page builder, especially with the new Gutenberg block editor (installed by default). Some themes include their own page builders, and overall page builders have become much more common because they’re easier for non-developers to use. We use and recommend BeaverBuilder, which is included on every site we build, including the special package below…
Self-hosted WordPress definitely sounds like the better option… but setup seems too technically complex!
In that respect, you are correct. I don’t know many business owners with the technical know-how (or time) to set up a self-hosted WordPress install. I do know some (especially artists), that like the idea of designing their website themselves, however.
It’s self-hosted WordPress that launches more easily than something like a limited Squarespace site, and it’s pre-configured, pre-loaded with a demo site, and ready to customize. You can sign up right now on cyclonepress.com and start designing in minutes. More demos are available and we’ll take care of all the launch pre-checks so you aren’t entirely on your own.
This is the same setup used on my done-for-you WordPress packages, but it’s more affordable for DIY soloproneurs who are just getting started. Hourly design is always an option if you get stuck, so it’s a safer choice than a random SaaS website platform.
I’m really excited to be offering this, and it’s been in the works for a while. Click the button below to get started on your own website. If you’re not the DIY type – never fear; our consulting-driven website design and redesign packages aren’t going anywhere. Schedule a discovery call to find out which option is right for you.
I’ve used a lot of WordPress plugins over the years. The plugins below are longtime favorites that come installed on every site we build. This post is for those curious how our WordPress hosting is better, developers interested in the tools we use and recommend, or savvy WordPress wielding business owners in need of new plugins.
Note: Some of these are affiliate links, but that’s irrelevant to me choosing them. I’m going to sing praise regardless because I dig these plugins. These certainly aren’t the only plugins we use, by the way, but I define “must have” as “bare minimum.”
For the uninitiated, a WordPress plugin is an added folder of code that extends the functionality of your website. You can easily install plugins from the WordPress dashboard. Decide to sell products? Install the WooCommerce plugin and you’re in business. Want to share recipes? Install a recipe plugin. This is one of the reasons we love WordPress. It really is that easy (and many of them are free).
Without a doubt, this plugin is #1. Contact forms are one of the most important components of your website, and we believe GravityForms is the best WordPress form builder. We build extremely complex forms, and there are an insane number of ways to add functionality. Generate PDF’s, send forms to Zapier, create auto-responses, use conditional logic in the form or notifications. I’m not really sure what features to even list here because it does all of them. We’ve built application forms, contracts, signup forms, payment options, estimates, post submissions… the list is endless. We often use/include additional Gravity Forms Certified Developer plugins to add even more functionality, depending on the client’s needs.
Caching is an absolute must for your website. It helps your website load more quickly by storing a cached version. We optimize for speed in every possible area, but if the only thing you did was install WP Rocket on your WordPress site, you’d still see a speed boost. Caching plugins are notorious for causing issues (caching in general is just a pain. Necessary–but a pain). There’s no telling what you’ll have to deal with if you’re using a free option, and many hosts will actually block you from installing free plugins. WP Rocket is in a league of its own.
Images are the biggest drain on your website’s speed. They should always be resized for web use before you upload them, but optimizing through your website is equally important.. We use ShortPixel, which optimizes images as you upload – no extra steps needed. Note that WordPress generates lots of thumbnails automatically, so 100 credits does not mean 100 images. Uploading 1 image is more like uploading 5 due to thumbnail generation (the exact number depends on your setup).
You can optimize 100 images a month for free, and ShortPixel plans start at $5. For cyclone press web hosting clients, optimization credits come free with your website (the number varies – generally we allot several hundred for the initial build, then drop down to 100/month, depending on how active/how many photos you’re uploading/if you’re a photographer, etc. We have plenty of credits to go around).
A security plugin is absolutely a must. While there are several good security plugins out there, we like iThemes. We believe in a layered approach to website security, and this WordPress plugin allows you to add a lot of layers from the dashboard (including 2 Factor Authentication for WordPress logins). Security plugins can sometimes be tricky to work around, but we’ve never had any major issues with this one. Wordfence is also a great option (if you don’t use the live traffic feature), and Sucuri is where you’ll want to go if you get hacked.
While Yoast is the popular choice for a WordPress SEO plugin, I’m not a fan. SEO Framework is cleaner and more user-friendly, without constant up-sells and ads. We find the free option is sufficient for our needs; adding meta information and providing feedback on posts and pages that need it, without being in your face.
When building a website, it can be difficult to collect feedback (“OK on the about services page, on the right-hand side, just underneath the image of the rubber chicken–yeah that’s the text this is replacing… no that photo’s on the left – the section just underneath that heading in blue…”). Not fun. We are huge fans of Userback for the ability to draw on the screen and leave comments right next to the photos or text to be updated. We install this for every website build to facilitate feedback by our clients. It can be used indefinitely to collect feedback or bug reports from your users, and we also use for design feedback and approvals. For our website agency, this tool is incredibly important.
I hope you found this list helpful. If you’d like to start a conversation about your website, schedule a discovery call or request a free website assessment to find out how we can take it to the next level.