how to set up the best free invoicing software - Wave Apps
bookkeeping-wave blog post

If you’re starting a business (or even just doing a few projects on the side), you must use a billing/invoicing/accounting system to track income and expenses. A spreadsheet isn’t terrible, but come tax time you’ll need reports. Creatives: do NOT try to use design software to make fancy invoices. There’s no way to track these, and you’ll end up with a nightmare.

  • In the early days of cyclone press I used an invoicing software (without real accounting features).
  • Then I used Xero for a bit, which is an up-and-coming cloud option.
  • After switching to a new accountant (with special software pricing) I broke down and switched to Quickbooks Online, something I swore I’d never do. While there were a few nice things, it was overall as terrible as expected, particularly in the recurring invoice department (practically nonexistent).
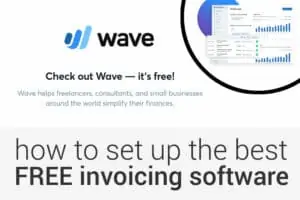
  • 2 years ago I switched to Wave and have no regrets whatsoever.

Wave is now the billing software I recommend to all my clients, and the best part is that it’s totally free. I want to quickly outline why I like it, then give you a walkthrough of how to set up a new Wave account.

Wave Accounting Pros

  • Wave is clean, simple, and incredibly user-friendly. It does what it needs to do, beautifully.
  • Recurring invoices are a dream. Easy to set up, and more importantly, easy for clients to pay. They can choose to save credit card info for automatic payment.
  • Online payment setup is practically instant.
  • Reconciliation is unbelievably easy.
  • It’s easy to add and switch between multiple businesses.
  • Zapier integration.
  • If you need payroll, you can add it (although that service isn’t free).
  • It’s easy to add users (bookkeepers, tax preparers etc.)

Wave Accounting Cons

  • My biggest complaint is that there’s no way to add credits to a client accounts. I use renamed invoices with positive amounts instead, but it’s an annoying workaround.
  • Products are not searchable.
  • I’d like to see more Zapier options.
  • No time tracking. I don’t actually see this as a con: I’ve never used this as part of an invoicing system and I think it should be separate anyway, but just FYI. I use Timecamp for the bulk of my time tracking.
  • Ads. HR Block bought Wave in 2019 so they’re obviously going to give themselves ad space, and because the product is free they’re trying to make money somewhere. You might click on a tab to discover it’s a partnership with another B2B product. As long as they maintain Wave this doesn’t bother me.
  • No downloadable app (I despise in-browser apps). There are ways to run cloud apps as a standalone app on your desktop (on Mac) which is what I do.
  • No way to digitally accept estimates.
  • Because it’s free, updates are infrequent.

I feel like I should clarify the fact that all of my cons are just nice-to-have features, not actual needs. The top two are really the only things I’d like to see updates for, but I can’t be truly picky because again, Wave is totally free.

getting started with Wave Apps accounting software

Here's a quick how-to process to get your small business up and running with Wave. At the end of this tutorial, you'll be able to send invoices and receive online payment.

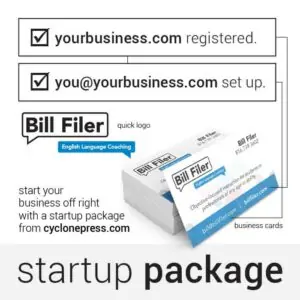
I'm no accountant, so none of this is legal/tax advice, but I do work with soloproneurs and startups to establish processes and set up software. If you need help getting set up with a business email address, branding or a website, get in touch.

how to set up the best free invoicing software - Wave Apps

Time Needed: 45 minutes

Cost

You'll need:

- business email address
- business bank account information
- bookkeeper/accountant name and email (optional)
- business logo, ideally transparent PNG
- business brand color code ("#000000")
- your sales tax rate (if you sell products)

Required tools:

- computer
- secure Internet connection

How to set up a Wave Apps account

Step 1 : Sign up for a Wave account

Click the link above to open the Wave registration page in a new tab and follow along. You’ll want to sign up with your work email and a strong password (or log in with Google).

Step 2 : Create a business account

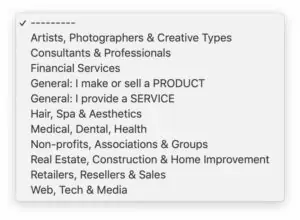
Follow the prompts to add the information for your business. Available business types are listed below.

Step 3 : Invite your accountant or bookkeeper

Chances are you’ll need to add another user to your account. You’ll find the option to invite users under ‘Settings’ in the sidebar, then ‘Users.’ There are currently 5 types of access level. Choose the appropriate level, then add your new user’s information. They’ll receive an invitation to join your account via email.


Step 4 : Customize the branding for your business

Under Settings, go to ‘Invoice Customization’. There are 3 invoice templates, an option to upload your logo and choose an accent color. While this doesn’t sound like much, the “Contemporary” template is well-designed so you don’t need to do much. Use a medium resolution PNG (with a transparent background) for your logo.

Now scroll down to customize your invoice terms, payment settings, and adjust units to your business. Make sure to ‘Save all changes.’

Step 5 : Adjust online payment options

Wave has their own payment processing system that makes it incredibly easy to accept online payments. Toggle these on and off as needed.

Step 6: Add sales tax (if you sell products)

Under Settings > Accounting, click ‘Sales Taxes’ add your sales tax rate, if needed.

Step 7: Add business bank account to receive payouts

Under Settings > Banking, click ‘Payouts’ and follow the prompts to add the bank account that online payments will deposit into.

Step 8: Add your business bank account for tracking expenses

Once your account is set up, look for the ‘Banking’ tab on the sidebar, then click ‘Connected Accounts’ to add your business bank account. Start typing to search for your bank, then select it and log in with your online banking credentials.

Important note: always separate your personal and business expenses. Go set up a business bank account and use it for all business purchases and payments. Do not use your personal bank account for anything business related. This is rule number 1.

Step 9: Add standard products and/or services (optional)

If you charge an hourly rate or have a flagship product, you’ll want to add those under Sales > Products & Services. Make sure you’re choosing the correct income account when you set these up. When you select ‘Sell this,” it will give you the default option to add it to the ‘Sales’ income account.

To better track different income streams you’ll probably want to add additional accounts, which you can do under Accounting > Chart of Accounts. For example: the bulk of what we do at cyclone press is web design, development & hosting, but we also sell business cards and other printed products, which I track under a separate income account.

Step 10: Send your first invoice (or estimate)

At this point you’re ready to go. You can create an estimate, then convert it to an invoice when accepted. Or send out that invoice for the project that was the impetus to get an accounting system set up in the first place.

If you created a product, you can click to add it to the estimate or invoice, meaning the 5 minutes of up-front work to set it up is going to save you a ton of time in the long run.

Choose to include a message when you email it, and pick how often you want the client to receive reminders to pay.

There’s a lot more I could cover on the day-to-day use of Wave, but because it’s so user-friendly, it’s going to be fairly straightforward to figure out.

Do you have specific questions?

Drop them in the comments and I might do a follow-up post. There’s also a chat bot inside Wave you can use to find links to help articles in the Wave Help Center.


Captain’s Log, April 1, 2020: Working from home with no end in sight.

I’ve been working from home for 10+ years. Or more frequently, out of local coffee shops. I’m missing both the cafe vibe and the ability to support the small businesses who need it most (other than the occasional drive thru or online order for pick up). The biggest challenge, however, is having a small, needy child at home the entire day. It’s really put a damper on the whole consistent work schedule thing (it died an immediate death).

I’ve seen a lot of articles about working from home. Most of them I haven’t read. The couple I skimmed were mostly fluff (one exception). So I’m just going to type a quick list, as things come to mind, after having done the work from home thing for years.

0. Get up at the same time every day.

After publishing this I realized something: I was assuming the reader would continue to get up at the same time every day. It was pointed out that this isn’t obvious to everyone, so I’m adding this caveat. Get up at the same time (or close to it) every day. Pretend you’re going to work. You are. It’s just in your house now.

If you had to be up at 7 every day previously, maybe it’s more reasonable to push it to 8 (no commute), but try to stick to a specific time. Factor in when the kids get up. But don’t sleep in until 11 and then drag yourself into the “office.” This list will not work for that. OK now, moving on…

1. Pajamas are for sleeping, not for working.

Isn’t it a cliché that people who work from home do so in their PJ’s? I feel like it is, but it’s dumb. Don’t do it.

The thing about clothes is that they affect your mental state. Imagine giving a presentation. You’ll put extra thought into what you wear, and when you know you look good, it affects how you present, doesn’t it? Most of us know this. What kind of work do you feel like you’re producing if you’re wearing pajama pants?

Don’t go overboard; there’s a middle ground between PJ’s and slacks. My modus operandi when home: leggings and light hoodies (i.e. comfy/no need to protect from cat claw snags). The important thing to note is that they’re different clothes than what I wear to bed. In a parallel universe, I suppose one could wear an evening gown to bed and flannel to work from home. It’s not the clothes themselves that matter so much; it’s the intention and mindset you’re stepping into.

1a. Make the bed.

You don’t have to, but it takes 2 minutes and it starts the day on the right foot.

2. Create a morning beverage ritual.

My love for coffee is well known. Perhaps less so is the fact that I’ve been mostly abstaining from caffeine the last several years. My dream is a cup of black not-decaf, but alas, my body is better off without it. I really miss the ritual of Aeropress coffee, which is my preferred method, but if you don’t like coffee, don’t feel like you have to miss out. I alternate between:

  • BioCoffee, which is this weird instant coffee mixed with wheatgrass that I don’t consider coffee at all
  • Decaf black tea
  • London Fog (black tea + lavender syrup + steamed milk)
  • Matcha latte (powdered green tea + steamed milk)
  • Chai latte (black tea + chai spices + brown sugar + steamed milk)
  • Decaf latte (decaf espresso + steamed milk)
  • Hot chocolate or drinking chocolate

Find something you enjoy and be consistent. Again, it’s the ritual that matters. The day really starts when you smell that coffee/tea/whatever and it signals the work is about to begin. Yes, I love coffee, but it’s less about the contents of the mug and more about the fact that I have a mug with something hot to drink. I could probably achieve the same psychological result with a mug of hot water, but who wants to drink that?

3. Create a dedicated work space.

This seems like it should be obvious, but I’m going to state it anyway. If you have an office, use it. I have a studio that doubles as my office on one side and and my art studio on the other. I mostly work at my desk. I often move to my beanbag for personal writing, so that’s where I am now. This afternoon it was beautiful so I worked on the porch for a bit. There are a couple spaces I’ll move to for a change, but 90% of the time I’m at my desk.

Come up with something to delineate your work space from the rest of the house. The key in this point is about setting boundaries: this is the place I work. It’s what you’re telling your brain, and your kids. If you have an office with a door, fantastic. Unfortunately, my studio is an attic room and does not have a door, so the kid can burst in at any time making laser sounds with LEGOS. Which leads me to…

4. Block off set periods for working and not working.

Full disclosure: I suck at this one. Like most entrepreneurs, I would be working nonstop if left alone (I’m not saying this is a good thing – just telling it like it is). My normal schedule (work while kid is at school) has turned into work when kid is not bothering me. Meaning the second he’s wrapped up in his LEGO scene I’m sneaking to my studio to knock out a few things. He inevitably realizes I’m gone, and Boba Fett decides to take his battle to the Studio system.

Because of this, it’s important that you are clear up front about WHEN you will be working. I clearly state I’m going upstairs to work, during his “morning playtime.” Depending on the day (and your kid), you might want to set a timer for an hour or something (don’t come into my office until the timer goes off). Apple finally made the obvious design decision to have a visual timer countdown on the Clock app, so if you have an iPad you can set that up where they can actually see how much time is left.

Another helpful thing here is to ask what special toy they’d like you to get out for that morning’s playtime. In our case, that’s either kinetic sand, a bucket of dry beans, playdough, car track, or potentially worksheets, coloring, or an easy puzzle. Just make sure it’s an activity that doesn’t require assistance. (Pro tip: hide some toys and only let your kids have them on occasion. You’ll always have something “new” and exciting to distract them). Obviously the iPad itself can be an activity, which is what we do for the afternoon work session (no game screen time until after 3 pm).

Not working: make sure you’re also scheduling time for other things. Not just chores either. See #10.

5. Figure out if you like ambient noise or silence.

Having worked out of coffee shops for years, I prefer ambient cafe sounds for working. I have a friend who used to rent a conference room just to work in complete silence. If you’re not used to working from home, finding your preferences might require a little trial and error. There are many curated playlists to choose from if you prefer music, but again, it’s the ritual that matters. Give yourself permission to experiment.

6. Take frequent breaks.

This one is tough. I prefer to sit down and work for a solid several hours. That’s not entirely healthy, and your productivity goes down after a certain point anyway. But the big reason for this one is that you will be interrupted. You can’t have the same expectations around work as you did when things were, well, normal. It’s best to just step into a different frame of mind, and be intentional about stepping away to refill the tea, make the sure the house is still in one piece, let the dog out, whatever. The weather has been gorgeous lately, so use every excuse to step outside for a bit. I need to be better about taking breaks anyway, so I’m trying to use the distractions that could be are frustrating as a way to develop healthier work habits.

Also, it makes you appreciate the occasional late night work session with no interruptions (but don’t do it too often).

7. Don’t work out of your email.

If your project management “software” is a notepad and a pen, it’s still better than using your email to manage projects. On a normal day, it’s a guaranteed way to prioritize the urgent over the important. On a day in the life of someone who doesn’t normally work from home, who can’t leave because they’re sheltering-in-place, with their kids… Yeah, not a good idea.

There are a million project management systems to choose from, but you need to first decide if the system is going to be more work than the work itself. Now might not be the time to try to learn new software (or maybe it is–your call). There’s nothing wrong with a notepad, which is how I effortlessly managed projects as an employee. As an entrepreneur? Eh I wish… I wear too many hats now, so I need something more robust.

“Your inbox is a to-do list to which anyone in the world can add an action item.” – Chris Sacca

Take the requests out of the inbox, then work off your list. It doesn’t matter what kind of list you use. If wrangling your inbox is a daily struggle, read my post on getting to Inbox Zero.

8. Use technology to your advantage.

If there ever were a time in history to be quarantined, it’s now. You can stream Netflix, Disney+, download games, order anything you want online, livesteam on social media, Facetime your family and friends. Most people know how to use these services (or they’re learning). Do the same for your business.

Here’s what you need to do. Map out your desired workflow. Figure out what areas you could streamline using software. Google that kind of software, and narrow it down to a few possible options. Ask your network for recommendations or sign up for free trials. Think about how you can automate things. Feel free to contact me if you need help or suggestions with this process.

  • I use Vectera for video chats, which doesn’t require software downloads. If you’re a Google Workspace (G Suite) user you have Google Meet.
  • Time tracking software is a must. I use Timecamp (love the menu bar timer), and I also recommend Toggl (free tier allows teams up to 5, better UI).
  • For project management we used monday, which is amazingly easy to use immediately, because it’s set up like a spreadsheet. It’s built for teams, so if you’re a single user it might not be a good fit. ClickUp is actually what we use now, as it’s similar but more affordable.
  • My CRM is Daylite, but unless things are slow for you, now might not be the time to get into CRM’s unless you’re also using it for project management.
  • I cannot speak highly enough about 1Password. This is 2020: you should be using a password manager. And no, Google Sheets is not OK. If passwords are a daily struggle, if you have time now, sign up for an account and input all your logins. You’ll wonder how you lived without it.
  • Specifically for teams; if you’re needing to work things out creatively and miss the whiteboard, look into a tool like Miro or Milanote. Project management systems are great for staying on top of things, but for mapping out strategies it helps to have a tool that’s more fluid.

9. Plan the next day the night before.

At the end of the last block of your work day, prioritize your tasks for tomorrow. Clean off your desk. Prep so that when you complete your morning ritual on the following day everything is ready for you.

If you check your email first thing in the morning, chances are what you work on will be what came in. So work off the list you made the night before. Do the important work first, when your mind is fresh and the coffee’s hot.

10. Make time for downtime.

This is a weird time we’re living in. If you run a business, you’re probably used to actual running to get things done. When you can’t do that, it might be tempting to be in your email all the time, or do low-value work that feels like being productive. Don’t do that.

COVID sucks. I know a lot of people are scared, but dwelling on the unknowns… it’s not helpful. For the first time in recent history, the entire world is united against a common enemy. At the same time, some of us are recognizing how unhealthy our workaholic tendencies have become. There are many articles that talk about how productivity is higher when working less hours, or how we should have 4 day work weeks, or allow more flexible schedules for employees. Social distancing, sheltering-in-place… this is finally forcing movement on a lot of these issues. It’s become a giant experiment instead of just talk.

If you’re a small business owner, you might feel helpless. But you might also feel like it’s a good time to reconnect with your family, spend time with your kids. Maybe pick up that hobby you’ve been neglecting. Actually read a book for fun. Take advantage of the downtime instead of just constantly working. If you’re someone who isn’t sure what to do with that downtime, I wrote An Introvert’s Guide to Quarantine Bliss for my personal art website. It’s all the things I will be/am doing when I get through the website and email updates/announcements and other client work.

People generally don’t start businesses because they want to work less (if they do, they’re in for a shock). Most of us work too much, because it’s hard work. I’m not advocating you fall asleep at the wheel, or don’t do everything in your power to set your business up to survive whatever is happening to the economy. But I know you’re already doing all that. Don’t forget to take a breath and take some time for yourself.

Bonus: create a daily schedule for the entire family.

This seems to be the best piece of advice I’ve seen. I’ve enjoyed seeing other families work from home schedules, but I don’t have anything so well organized at the moment. See HBR’s Guide for Working (From Home) Parents.

I hope you found this list helpful. If you have questions or there’s something you’d like to hear more about, please comment below or send me an email. I’m planning a future post about how to use this time to work on your business (hint: it’s storybranding).

Note: this post contains affiliate links.

free business card design template with bleed

In this post I’m going to show you how to set up bleeds for printing, because it’s one of the most common designer errors I see. I’ll explain what bleed is and why it matters, then show you how to properly set up your files for print production.

Q: What is bleed?

A: In general, bleed simply refers to any color, lines, or other graphics that extend past the trim line. In printing, when we say the art files need to have bleed, what we’re really saying is that the art needs to extend an extra 1/8” past the trim line. Bleed, in this context, is referring to that extra 1/8″.

Q: When does my file need to include bleeds?

A: When you have a design with any elements intended to “bleed off” the edge of the paper, you need to extend those elements an extra 1/8″ past the edge. The mistake is in designing the art to run right up to the edge, but not including that extra 1/8”.

Note: In the images below, the cyan border indicates the trim line. The magenta border indicates the bleed line.

This artwork does NOT bleed, and the file size should be the same as the trim size (8.5 x 11).
This artwork DOES bleed, and the green/gray bar and stroke should extend 1/8″ past the blue border (8.75 x 11.25).

Q: Why do I need to set up bleeds in my artwork?

A: If the item bleeds, it has to be trimmed. While this is done on a machine that’s very precise, there’s still the potential to be slightly off. Without bleed, the person trimming your business cards or brochure would have to trim exactly on the edge of the art – a hair off and you’d have a white line instead of color or graphic all the way to the edge.

See the objects flyer sample. I highlighted the 1/8″ bleed in magenta. Imagine if that pink background were actually printed. You can see how there would be a good chance of seeing a pink hairline on the edges of the flyer after trimming the incorrect file.

WRONG: pattern stops at trim line.
RIGHT: pattern extends to bleed line.

ok, so bleeds are important. how do i set them up?

Q: What size should my bleeds be?

A: For most print projects, the bleed should be 1/8″ (.125). There are exceptions; for large items like posters or signage, printers want more bleed, generally 1/2″ (.5).

Occasionally, printers don’t need bleed for larger items, but these cases are the exception, not the rule. And supposing no bleeds are needed, it’s easy to crop your artwork to size, but the reverse… not so much. It’s always better to build bleeds in at the beginning of the design process. Make sure when you set up your document size, you’re also setting up the bleed settings and extending your artwork.

Q: How do I set up bleeds in my art files?

A: The correct way to set up bleeds is in the page/document settings. Your software will add a magenta border outside the trim line so you know the minimum distance to extend your background color or pattern.

In InDesign, when you create a New Document, there will be bleed settings at the very bottom (you may have to click “More Options”). Set this to 1/8″ (.125″) on all sides. For an existing document, go to File > Document Setup > then add the .125″.

In Illustrator bleeds are also in the New Document window, or under File > Document Setup for existing documents.

It’s telling that Photoshop does not have bleed options; it should never be used for print layouts. However, if you find yourself having to export a PSD file for printing, simply make the document size 1/4″ larger than necessary and make sure the art extends to the edge. For example: if your project is intended to be 5″ x 7″ finished size, make your document size 5.25″ x 7.25″.

Q: How do I export my files for printing?

A: As a PDF with specified bleed settings. This is an important step; if you set up the file properly but forget this part your file will lack proper bleeds.

In InDesign, go to File > Adobe PDF Presets. Choose High Quality Print, or PDF/X-1a:2001 if your artwork has transparency. After you hit Save, you’ll see an Export Adobe PDF dialog box. Select the Marks and Bleeds tab on the left, then click “Use Document Bleed Setting.” If you set those up properly, it should change from 0 to .125″. Crop marks are optional and depend on the printer (they can still work with the file if you leave them off).

In Illustrator the process is the same, except that you will choose File > Save As > PDF, then change the Adobe PDF preset in the dropdown at the top.

Again, Photoshop should not be used for print files, but if you must, you generally should be saving as a TIF file. The process won’t be any different as long as you’ve made the document .25″ larger (5 x 7 becomes 5.25 x 7.25).

quick video of how to set up a new doc and export with bleeds

Hopefully this post has answered all your questions, and you now understand why bleeds matter and how to use them. If you’d rather not worry about it, contact us about designing your print files so you’ll know they’re ready for production.

Most of our clients just send us what they’re thinking and we create a design, or send in new names and info when they have new employees who need cards. But the bleed question does come up from time to time, so I figured it was time to address it in a blog post as a service to any designers trying to get files ready to print.

If you have any questions, please comment below. You can also make suggestions for topics you’d like us to cover. Education is a huge part of what we do at cyclone press, so if you have a nagging question about design, printing, website development or why your Mac does that weird thing it does, let us know.

Embedding a Google map on your WordPress website is no longer a simple (or free) process. Find out why and how this affects you.

In May 2018, Google announced pricing plans for Google Maps.

Beginning June 11, you’ll need a valid API key and a Google Cloud Platform billing account to access our core products. Once you enable billing, you will gain access to your $200 of free monthly usage to use for our Maps, Routes, and Places products. As your business grows or usage spikes, our plan will scale with you.

via Google Blog

Here’s the most important note for our clients: “We estimate that most of you will have monthly usage that will keep you within this free tier. With this new pricing plan you’ll pay only for the services you use each month with no annual, up-front commitments, termination fees or usage limits.”

As cyclone press works exclusively with small businesses and soloproneurs, most of you should be fine unless you have crazy high traffic on your website. In this case, the people this affects most are developers. It’s now become a pain for us to embed a Google Map on your website (or more likely, fix the map on your website that is now broken), because we now have to create a Google Cloud billing account and have you log in and assign credit card info.

Here are the key things to note in less intimidating bullet point form:

  • Use of Google Maps now requires 2 things:
    1. A Google Cloud billing account connected to a valid credit card
    2. An API key (this was already in effect)
  • You will receive $200 of free monthly usage to use for Maps, Routes, and Places (for now)
  • Most small businesses will not have enough traffic to exceed the free monthly usage, meaning you will not be charged
  • Google Cloud has a notice saying they will notify you before billing

So how does this affect you?

If you’re a website client of cyclone press and have an embedded Google Map on your WordPress website, we’ve already emailed you with steps to add billing info to Google Cloud. You’ll need to do that to remove the “Oops! Something went wrong.” notice. Instructions below. We’ll have already created a project in Google Cloud and generated an API key.

How to add credit card info to a Google Cloud account:

  1. Log in to Google Cloud Console: https://console.cloud.google.com
  2. Billing > Manage Billings Accounts > Add Billing Account
  3. Agree to Terms, then enter business name, address, credit card information

How to create an API key for Google Maps:

If you are not a client of cyclone press and don’t have a dedicated developer who manages your website, here’s how to create the API key yourself (do this after creating a Google Cloud account above).

  1. Log in to Google Cloud Console: https://console.cloud.google.com
  2. APIs & Services > Dashboard
  3. Create new project
  4. Enable APIs and services
  5. Maps Javascript API > Enable
  6. Credentials > Create Credentials > API Key
  7. Copy > Restrict Key
  8. Rename /  HTTP referrers
  9. Copy API key
  10. Paste the API key into the API field in your WordPress theme (location/setup will vary)

Conclusion

While this won’t end up being another bill for most of our clients, we’ll still be keeping a close eye on the competition and looking at alternatives. The free $200 credit feels like a promotion, which makes me wonder if they’ll remove that as soon as businesses have gotten used to the new normal.

Additional Links:

We’d love to know what you think about this change, whether you’re a website owner revising your strategy, or a developer still looking for his lunch money. Let us know in the comments.

Products with higher adoption rates are often easier to integrate with other services. That’s one of the biggest selling points for Google Workspace (formerly G Suite), which is simply a paid Google account using your own domain ([email protected]). You can use all the features accessible with a free Gmail account, with a few extras and paid support. These are the accounts we set up for our website clients. Once the domain name has been connected and the Google account fully set up, the processes below are how you to add your new email on all your devices. Click the link below to skip to your specific device.

Google Workspace Email Setup Instructions for iPhone/iPad

If you prefer, you could also download and install the iOS Gmail app.

  • Settings > Accounts & Passwords > Add Account
  • Select Google
  • Enter your Google Workspace email address and password
  • Tap Next. Mail will verify your account
  • Choose which contact and calendar accounts to sync
  • Save

Google Workspace Email Setup Instructions for Android

  • Settings > Accounts (& sync settings)
  • Add account
  • Tap Google
  • Sign in with your email and password
  • Choose which contact and calendar accounts to sync

Google Workspace Email Setup Instructions for Apple Mail

  • In Apple Mail, click Mail > Preferences > Accounts
  • Click the + icon to create a new account
  • Click Google
  • Sign in with your email and password
  • Select the apps you want to use

Google Workspace Email Setup Instructions for Outlook

For Office 365 / Outlook 2016:

  • Open Outlook and go File > Account Settings > New
  • Enter your email address and click Connect
  • Enter your password, then OK > Finish

For Outlook 2013 and Outlook 2010:

  • Open Outlook and go File > Account Settings > New
  • Enter your full name, email address and password

Manual Settings

Account TypeIMAP
Incoming Mail (IMAP) Serverimap.gmail.com
Requires SSLYes
Port993
Outgoing Mail (IMAP) Serversmtp.gmail.com
Requires SSLYes
Port for SSL465
Requires TLSYes, if available
Port for TLS/STARTTLS587
See Google Help Article here.
Item added to cart.
0 items - $0.00